DR LIVE character creation
Once you are ready to attend your first Dystopia Rising Live event, you’ll need to design your character. You can save a lot of time at check in by pre-building your character BEFORE arriving on site. Let’s walk through how to create a character sheet for the new edition in the new DRL Database.
If this isn’t something you’ll be able to complete before the event, that’s fine. We will help you write your character on site, but you’ll end up using having a paper character sheet and a calculator to figure out your sheet if you don’t have phone access. If you want a fancy printed sheet available at check-in, let’s make sure you have the sheet ready in time!
Our October National Event was the first ever DR Live event in the history of the network!
Step 1: Access the character Database
First, make sure you have the right link! If you’ve been lurking for a while before your first game, a link was once circulated that is no longer active. Basically, if the word “staging” is in the link at all, it’s the wrong one. Check the URL on your browser to make sure, as this is the single most common error we’ve heard folks have encountered.
Here’s the correct link: Project Juno
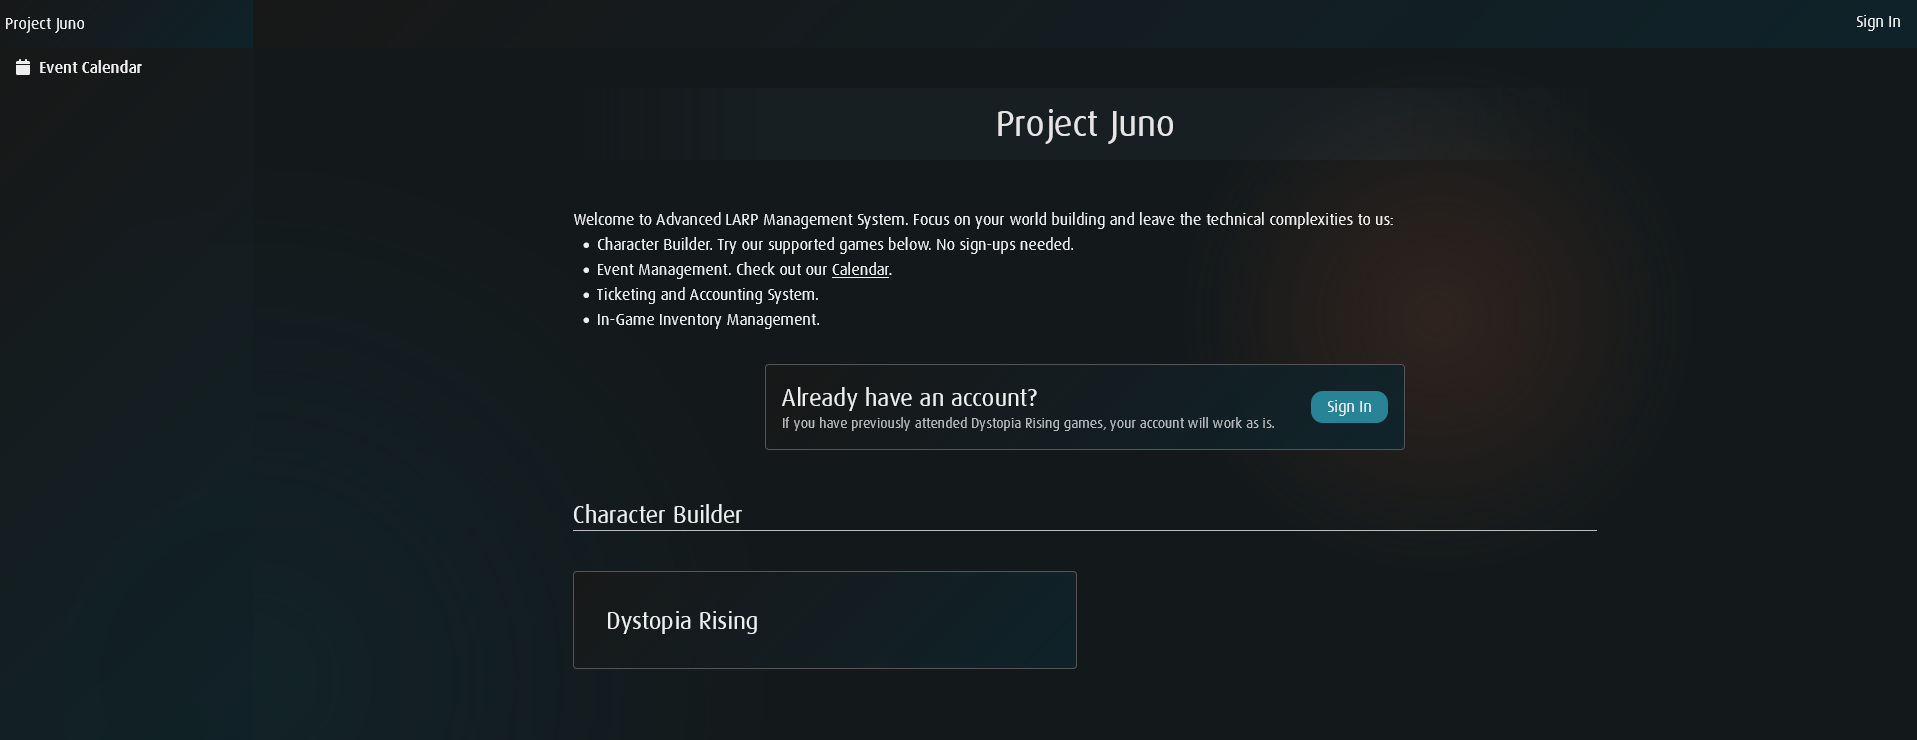
Here’s what the landing page should look like
Step 2: Click the “SIGN IN” button and log in
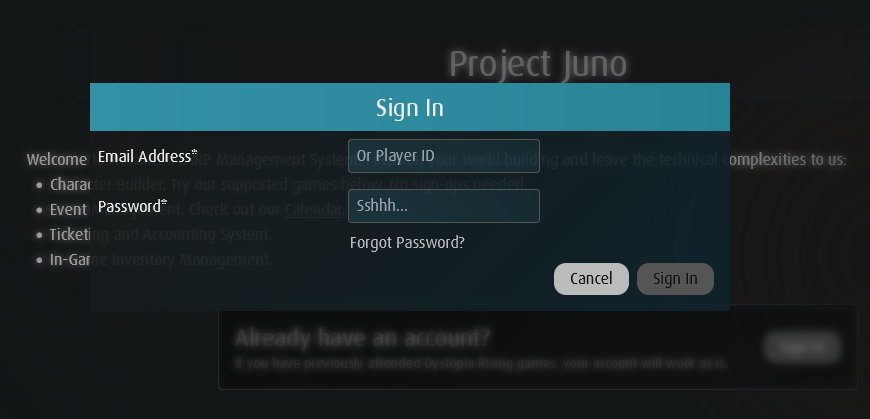
To start the process, let’s click the blue SIGN IN button. This will bring up the Sign Up box for your email address and password. One of the cool things about the new database is that it uses all the same info as the old 3.0 Character Database (if you don’t know what that is, it’s okay!)
If you are a new player and this is your first game, then you will have an account created for you after you register using the ticket purchase system. Usually new player accounts are created once pre-reg for the event closes, and we will check you in manually to the shifts you want, so you do not need to self-check in your first game.
If you are a pre-existing player, and this is your first time using the new check-in system, then you may need to reset your password to log in.
If you are still unable to log-in, email us at info@dystopiarisingtx.com
Once you’ve logged in, choose your organization (Dystopia Rising, clearly) to open up the main database home page.
The SIGN IN pop up box
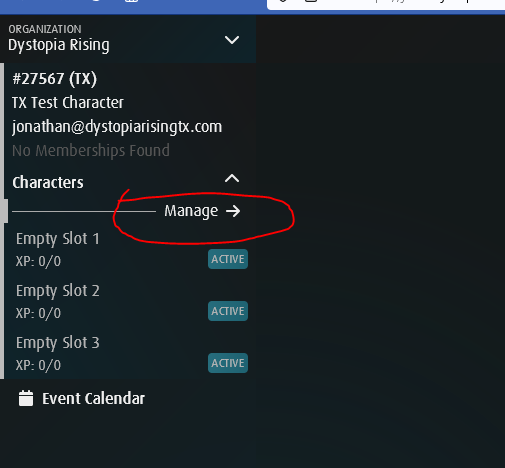
Step 2: on the left side column, click on “Manage”
Now that you are logged in, you can begin to create your new character. Look on the left-hand side of the page, and you’ll see a list of your available character slots.
If this is your first DR Live character, or you have an empty slot, the next step is easy.
Click on the “Manage” button to open up the character editor.
If you are a returning player from 3.0 that already has a DR character, you’ll need to do an extra step before you can continue.
Each participant has three character slots available
optional: make sure your DR LIVE characters are migrated
If you are a returning player and this is your first DR Live character, you’ll need to wait until your existing characters are converted to a new EXPERIMENTAL character slot. Once DR Live fully launches in April 2025, you will no longer have to do this step.
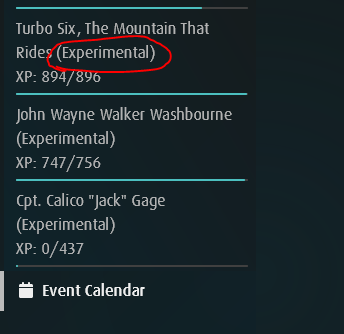
If you don’t see an character on the left hand side of the Juno page marked with the (Experimental) tag, your account still needs to be updated.
If you try to access a 3.0 character slot, you’ll just see a note that reads “This Character has not been migrated and is incompatible with DR: Live Rule Set.
All you have to do is Check In to a DR Live event to start this process!
The Network Support Team have been getting this done pretty quickly, but you can expect up to 12 hours until this slot is added on your account. If you still don’t see something after a few days, send us an email at info@dystopiarisingtx.com and we will help you resolve the issue.
Once you can see an (Experimental) tag by your character slot, you can start brewing up your DR Live Build!
Look for the (Experimental) tag on your character
The error message you’ll see if your character slot hasn’t been migrated yet
step 3: select a character, or create a new character
There are several types of character slots on the database. For most players, you’ll have Active or Staged characters. Returning players may have Experimental slots until April 2025, as mentioned above.
An Active Character can check in to games and receive XP from ticket purchases.
A Staged Character can be edited and changed by a player, until a member of staff changes the character to Active.
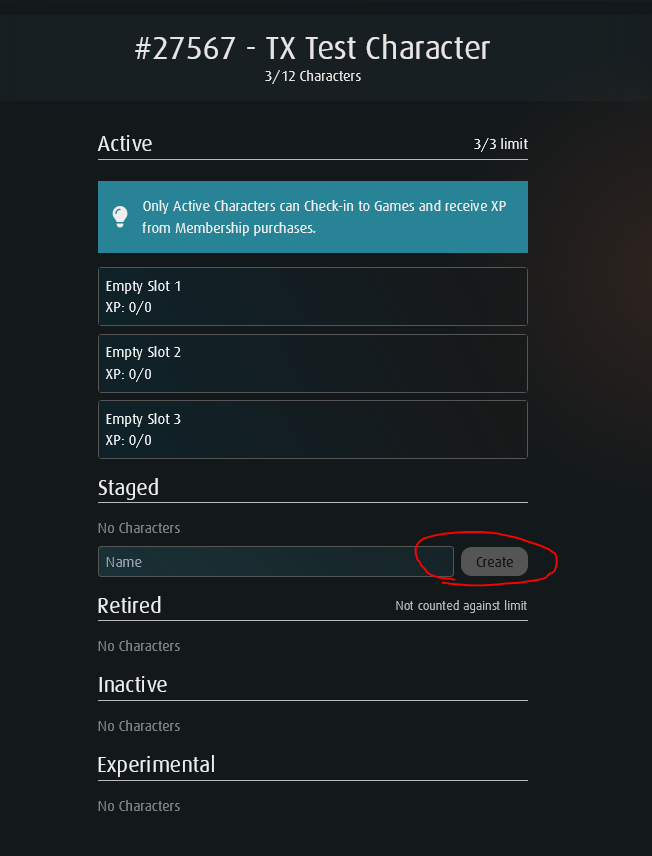
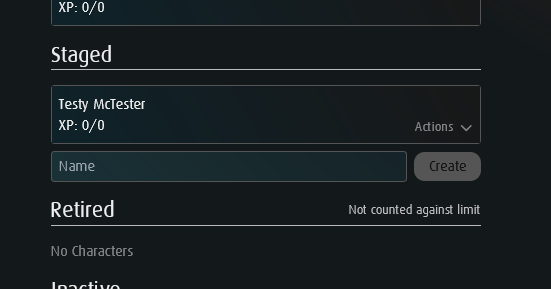
To make a new character, simply type a name for your new character in the box and click “Create”. This will add your new character to the list of character slots on the left side of the page and list the character under the “Staged” category.
To edit an existing character, click the name of the character in the Active or Experimental sections.
An Experimental Character is a copied character slot from an existing 3.0 character. This is the character that existing players will edit for DR Live until the database has been fully transitioned.
step 4: unlock your character
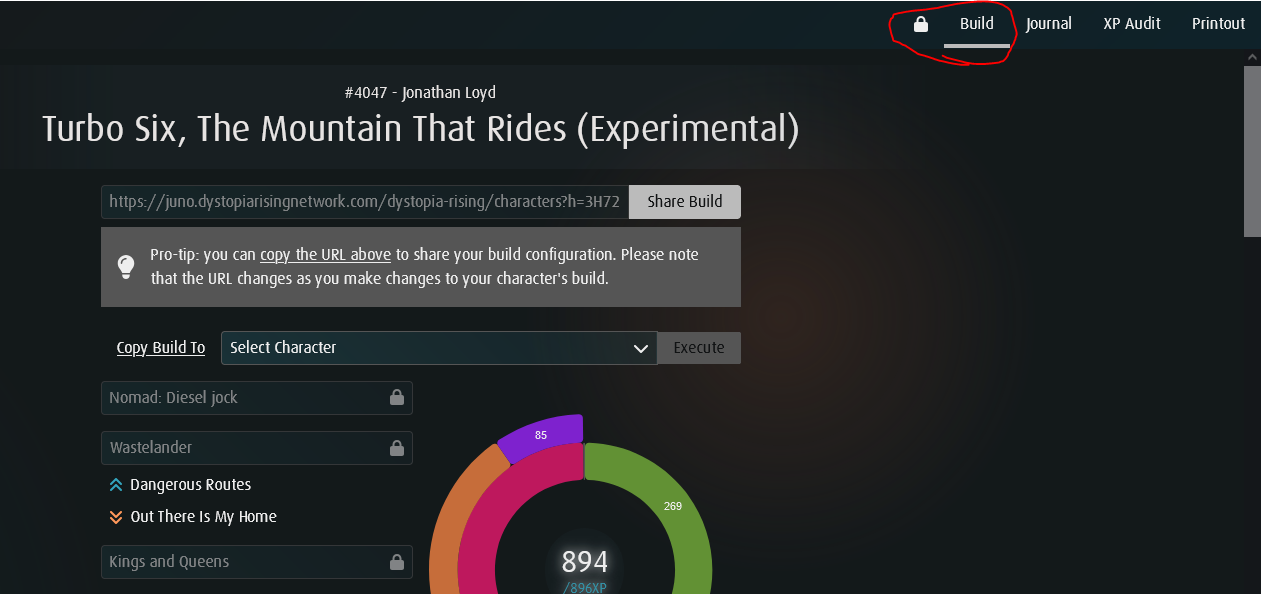
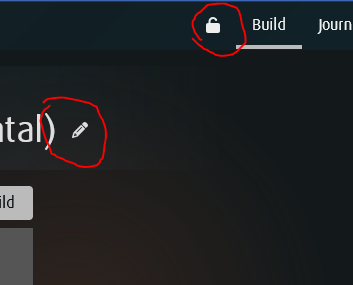
Once you’ve selected or created the character, make sure you UNLOCK the character. You’ll find the lock button on the top right of the page, marked with a little LOCK icon.
Once you are unlocked, you’ll be able to edit the character sheet sections.
If you accidentally leave this page while editing your character, don’t worry. The database will automatically LOCK the character when you leave the page.
Where to find the Lock button
step 5: choose your strain and faith
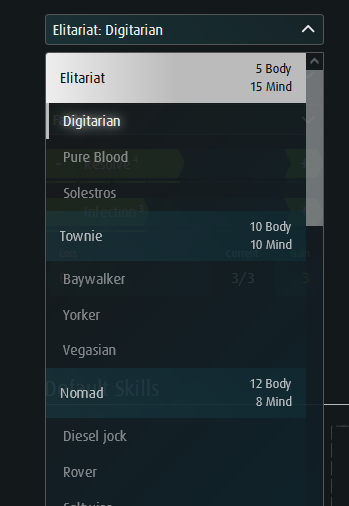
You first need to choose which Lineage and Strain your character will be from. If you don’t choose a Lineage first you may experience an error as you continue creating a character. Your starting Body and Mind is determined by your choice of Strain.
Read more about Choosing a Strain
You can also choose a Strain Variant in the character builder. The default choice is the Standard Strain, but you can choose Wastelander or Civilized on your character sheet if you’d like to use the advanced rules found in the book Strained Ancestry.
Read more about Choosing a Faith
If you’ve been Inducted into a Faith, you can choose from the menu or you can leave it as “Faithless” if you’d rather leave this for later or make a decision in-game.
step 6: complete your character
This next part is mostly self-explanatory, but you can find further details in the Player’s Guide on the specifics of character creation. I’ll cover the basics and new additions of character creation here just in case.
Here’s a few helpful page numbers to reference during Character Creation:
Character Creation Quick List (p. 8)
Earning and Spending XP Points (p. 13-14)
Default Skills (p. 30)
Impact Skills (p. 33)
Development Skills (p. 41)
Lores (p. 53)
Professions (p. 55)
optional: share your character build
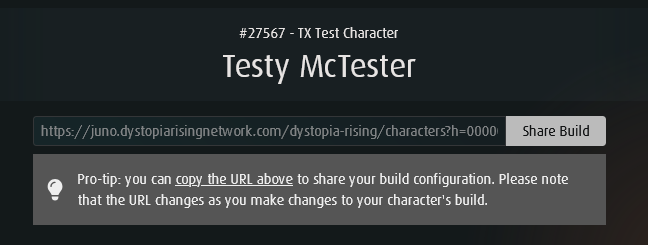
You can save your progress or share your build with friends by using the link at the top of the character builder. Each time you make a change to the sheet, the URL for this link will change, so you’ll need to use a new link if you update the sheet.
You can also use the Generic Character Builder to try out the builder if you haven’t been able to activate an Experimental slot or you don’t have a player number yet.
step 7: lock your character sheet
Once you’ve finished all your edits to your character for your first DR Live event, make sure to select the LOCK button on the top right corner of the page. You can always tell if you are in edit mode by looking for the Pencil or Unlock icon near the top of the page.
Juno will automatically lock your character when you leave the page, but locking the character is helpful to prevent any accidental clicks while you are planning.
TIP: If you accidentally overspend on your character, it will delete random skills and purchases to get your character under the XP totals after you save the character. Make sure you are following along on the XP Wheel as you plan out your character and save yourself some frustration trying to re-edit the sheet.
Character Sheets will need to be entered in the Juno Database before the Saturday before the next game. if you create a character After this point, you’ll get a HANDWRITTEN or printed sheet at game.
Make sure to lock the character when you are done!
In Depth Character Creation guide
For those that want a more in-depth guide to character creation, I’ll cover a few of our DR:TX suggestions for character creation below. Remember, you can always rewrite your character during your first few events, so if you try a certain build out and change your mind later, you can make changes after your first event.
Every Survivor is talented at something, and those talents are part of why you are still alive in a cruel and dangerous post-apocalypse. Skills are abilities you gain in play that augment the natural abilities that you, as a person, have so that you are able to enhance your character’s abilities above and beyond your real-world capabilities. Stats are the core abilities of how tough your character is, what kind of mental fortitude they possess, or even how many times they can die before coming back as a zombie. You can even unlock more powerful versions of the starting skills called Professions as you continue to play the game and progress your character.
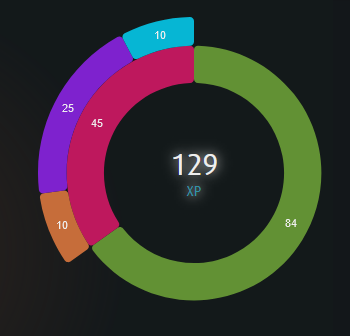
Keep track of your spent xp with the new XP Wheel
This is an awesome new tool that shows where you’ve spent your XP on the character. Each section from Development Skills to Impact Skills will show up in a different color.
Green - Stats (Body, Mind, etc.)
Orange - Impact Skills
Purple - Development Skills
Blue - Aberrant Skills
Yellow - Professions
Red - Total XP in Skills
When in doubt, we recommend trying to balance out how many XP you spend on Skills vs Stats. There’s no real rule for what your ratio should be, but spending at least 1/3 of your total build on Stats is a good mark to aim for. Body and Mind are important in game, so don’t forget to save XP!
The new XP Wheel is awesome!
resolve & Infection
Each character starts with three (3) Resolve and Infection (p. 15-16, Player’s Guide), and you can increase these stats with XP.
Resolve - This is a measure of your will to survive and how you power very powerful Skills and equipment. You can’t easily regain Resolve during an event, so spend it wisely!
New Players won’t have a lot of use for this Stat, but it is used in a number of mechanics in the game, including your Lineage Advantage. You can start with additional Resolve to start, but we recommend saving this for later in your character’s story.
Infection - This is the number of times you can return from death before becoming a zombie, in most cases. Infection is used during powerful Necrology procedures and can be difficult to restore once it is lost.
When you lose your last Infection, your character is permanently dead! Once you run out, you’ll need to make a new character!
Keep in mind that these Stats are pretty expensive to increase, so this might be a later goal if you are just starting out.
Default Skills
Every character has access to the Default Skills (p. 31, Player’s Guide), but this also includes your stats of Body and Mind on the character builder. Your starting Body and Mind is determined by your choice of Lineage.
Body - This is a measure of your toughness, and how much damage you can take in combat. This is similar to Hit Points in D&D, or Health or Stamina in a lot of video games. You can regain lost Body by using healing items like a brew or injectable, or by having another character use a healing Skill on you.
Mind - This is how you fuel using your Skills in game and is similar to Mana or Energy in video games. You can restore these Mind points by using a restorative brew or meal, having certain Skills used on you, or by helping during a crafting project with an ability called “Skilled Assistant”.
Your first 10 Body and Mind only cost 1 XP each, making it one of the most efficient ways to spend XP when you first start out. Once you get above 20 Body or Mind it’ll start to cost more, but you’ll probably have a few points left over to spend after you select your skills.
As soon as you’ve acquired a total of thirty (30) extra Body and Mind beyond what you start with as your Strain, you’ll unlock the Default Professions (p. 56, Player’s Guide) of Battle Wall, Shock Trooper, and Violence Technician.
These are probably the cheapest Professions to unlock on a character, but it’ll likely be out of range for brand new starting characters, since it still costs 10 XP to purchase your first Profession.
Starting Body & Mind Suggestions
Mind Points let you use Development Skills. You can never go wrong with spending XP on Mind points, but if you don’t take a Development Skill you shouldn’t spend XP on this Stat.
You should try to buy Mind points in intervals of “5”. If you start with an odd number of Mind, plan to spend your starting points on raising your Mind. Most skills in the game need 1, 5, 10, or 15 Mind points to use, so if you have an odd number of Mind points you might not be able to use them effectively.
Every character starts with at least 5 Mind. If you don’t take one of the Development Skills, you likely won’t use your Mind at all during a game. We recommend most characters take at least one Basic Development Skill for this reason.
When purchasing Body, remember that most attacks hit in variants of 5, 10, 15, or 20 damage. Having 1 more Body than a common attack means you can survive one powerful unblocked attack from a threat. We recommend at least 11, 16, or 21 Body for these reasons.
IMPACT SKills
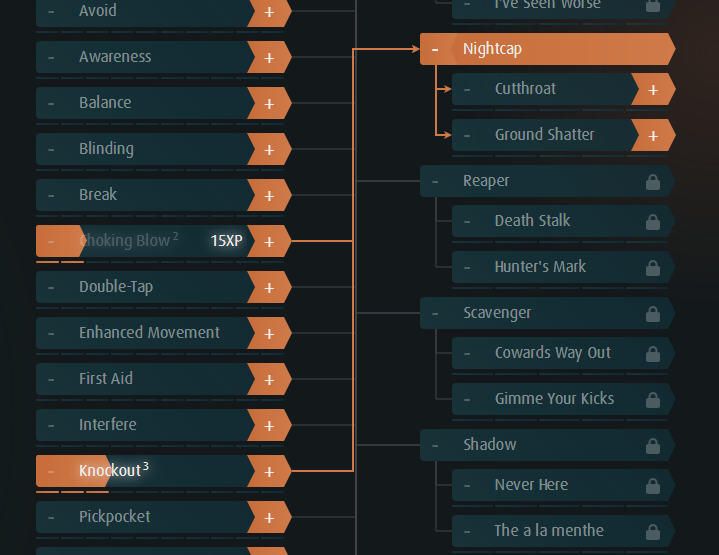
Impact Skills (p. 33, Player’s Guide) are the bread and butter of DR Live characters. These are quick use skills that reset every 20 minutes if you’ve not used other Impact skills or weapons in that time frame. This means these skills will get used a LOT in DR Live, and each time you purchase a use of an Impact Skill it increases the number of times you can use it before running out.
If you purchase at least five (5) uses between two linked Impact Skills, you’ll be able to unlock the linked Impact Profession (p. 57, Player’s Guide). You can easily see the dependencies of these skills by following the lines next to the Impact Skill. Once you’ve unlocked the Profession (p. 55, Player’s Guide), you’ll be able to purchase the appropriate Profession Impact Skills. Remember, you can only have three (3) total professions split between both categories.
Remember, as a starting character you can use these skills basically every 20 minutes. You’ll have something you can do in virtually every fight over the weekend, so these definitely feel more rewarding than Development Skills.
You’ll probably be able to unlock your first Impact Profession for as few as 65 XP, so this will be a purchase for after your first game.
Starting Impact Skill Suggestions
Some good starting combat-oriented Impact Skills are Blinding, Break, Takedown, or Piercing Strike. These work against most enemies in the game, but certain types of enemies may be immune to skills like Blinding and Break.
There are three primary defensive skills in Avoid, Balance, and Mental Endurance. These are all defenses against most enemies in the game, but Avoid is a VERY good first skill, as it lets you avoid the negative effects of most single melee or ranged attacks in game. This will help you survive until the end of the event!
Some additional less combat-focused Impact Skills that are useful are Double Tap, First Aid, Trap Dis/Arming, and Salvaging. These are great choices if you don’t want to engage in much boffer fighting but still want to feel useful.
First Aid is a great skill for a combat medic type role. This skill will help you save your allies in a fight, or simply patch people up after the skirmish is over. You can even use this skill without spending a use to Stabilize someone for free, so this is a handy skill to have.
Stealth is an amazing skill for survival. Most enemies can’t detect you while you are using this skill, so this can be an excellent way for a new player to survive a tough fight at night or simply get back to your bunk safely.
aberrant skills
Aberrant Skills represent your characters unique connection to the “magic” of Dystopia Rising, through powers called Psionics, and through your connection to in-game Faiths. There are both Aberrant Impact Skills (p. 39, Player’s Guide) and Development Skills (p. 49, Player’s Guide), and the faith-related skills can allow you to join one of the many in-game Faiths.
NOTE: Taking even ONE Aberrant Skill gives you the Keyword “Aberrant”. You can find details of the penalties this includes on p. 25-26 of the Guide’s Guide. This means that certain zombies, monsters, and items are especially deadly to you, so keep this in mind before you choose one of these skills. However, these skills can be incredibly powerful and useful, so many feel it is worth the risk. This is not a choice you can take back easily, so be careful!
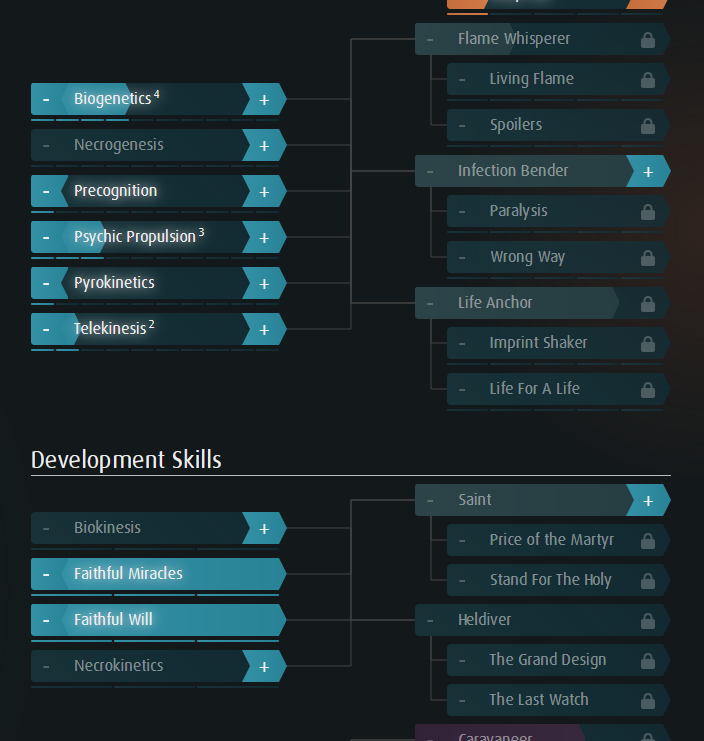
Aberrant Skills can unlocked the linked Aberrant Professions (p. 62, Player’s Guide), and you can see the linked skills by following the blue lines that connect them to the appropriate Profession.
Any purchase of these skills makes you an Aberrant. Be careful!
Starting Aberrant Skill Suggestions
Some good starting combat-related Impact Skills are Biogenetics, Psychic Propulsion, Telekinetics, and Pyrokinetics. The Development Skill Necrokinetics can be a quick way to get involved in learning more about the mysterious Grave Mind.
Biogenetics is the stand out Aberrant Impact Skill for new players, allowing for quick emergency healing in the middle of a fight that is faster than skills like First Aid or Medical. Biogenetics is the only healing skill that can immediately heal a wounded ally for 2 Body. All other forms of healing need more time to heal or are very limited without specific equipment. Many players chose to be an Aberrant and take this skill simply because of how useful it is.
The two faithful Aberrant Development Skills, Faithful Miracles and Faithful Will allow you to provide powerful buffs for people that share your same faith. These are great choices if you want to pursue a role as a priest or faith leader in game, but you can participate in a faith or use most Benedictions even if you aren’t psionic.
development skills
Development Skills (p. 41, Player’s Guide) are the only Skills fueled by Mind Points. These offer powerful ways to interact with crafting and the in-game economy, as well as faith skills and other ways to interact with Grave Mind.
Remember, Mind Points don’t refresh until the end of the event, so be careful about spending too much XP on Development Skills without also raising your amount of Mind Points.
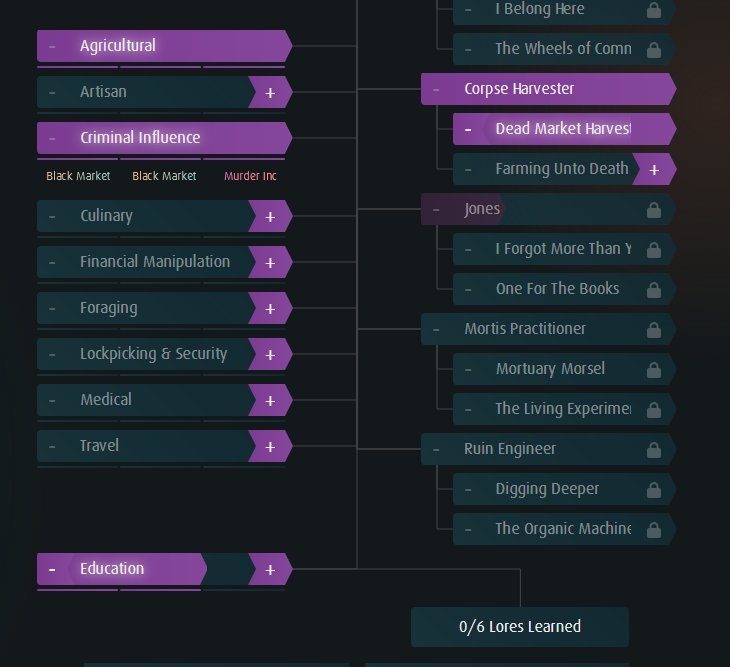
Development Skills have a different cost than Impact Skills, but can unlock Development Professions (p. 60, Player’s Guide) when you reach Master-tier on two linked skills. Like the Impact Professions, you can see the dependencies via the purple lines that connect the skills. Many of these Professions provide new ways to spend Resolve or Mind. Remember, you can only have three (3) total professions split between both categories.
For new players, remember that every Strain starts with Mind Points, even if you choose not spend any further XP on this stat. As such, it’s always a good idea to reserve 5 XP in your build to give yourself a way to use those Mind Points before the end of the event.
If you choose the Criminal Influence skill, you’ll also need to select either “Black Market” or “Murder Inc.” for each level you purchase.
Starting Development Skill Suggestions
Some good starting Civilized skills are Artisan, Agricultural, Education, Culinary, or Medical.
Basic Medical is particularly useful for a new character, as it only requires 1 Mind to use! Since you can heal 10 Body per 1 Mind spent, this is the most efficient healing in the game. You can even help others and regain some of your spent Mind!
Artisan is used to repair and craft equipment like weapons, armors, and gizmos, and can allow you to repair armor for only 1 Mind point. Culinary is used to craft consumable items like meals and brews, and Education is used to craft Blueprints.
Foraging can allow you to collect Foraging cards you find across the game site and can be turned in for useful scrap and resources. However, since it costs at least 5 Mind to turn in a Foraging card for scrap, you’ll only be able to do this a few times without help.
Agricultural is an always useful skill, as one of the few ways to make Herbs, while Travel allows you to purchase Produce. These two items are used in most Culinary recipes. Even if you can only do this a few times, these items are always in high demand.
Criminal Influence is a CvC related skill, or Character-vs-Character. This can be a fun way to play the game but may involve into conflict with your fellow survivors. This can get you access to the Black Market, or the secretive assassin’s guild, Murder Inc. Talk to our New Player Guides if you’d like to learn more about the shady side of criminal behavior!
We recommend that you save skills like Financial Influence and Travel for later, as these are more useful with more access to in-game Currency and XP. If you are an Elitariat, taking Financial Influence can allow you to use your Lineage Advantage. Travel is the cheapest Mind cost of the two to use at first but requires at least 5 local currency to use.
lores
Lores (p. 52, Player’s Guide) represent the deep knowledge your character possesses of various topics of study. If you choose the Education Development Skill, you’ll unlock three (3) new Lores per level you purchase.
NOTE: Since you can only gain 9 Lores with the Education skill, this means that you will not be able to have every Lore that exists. You’ll have to make a choice!
Remember, the Education skill is generally needed to copy most Blueprints in the game.
These Lores are frequently needed to craft certain Blueprints, interact with Zones of Mechanics in game, or on various Lore Cards you might find during an event.
The Jones Profession offers several ways to interact with Lores via the Development Skill and certain crafted items.
Which one is your favorite lore?


